February 27, 2015

Proud teacher. Stay warm vol. 1

More works made by my students and friends. Aren't they awesome? And what about Susana, the cat? Does she like wearing the owl hat or doesn't she? I'm not sure..., what do you think?

I can't believe how different this fingerless gloves can be depending on who make them and the colours you use! It seem the simplest pattern ever, but yet you can get very different effects.

Well, enjoy this girls work, because it's worth!

Más trabajos hechos por mis alumnas y amigas. No son chulísimos? Y qué me dices de Susana, la gata? Le gusta llevar el gorro o no? No lo tengo muy claro..., tú qué crees?

No puedo creer los diferentes resultados que se consiguen con los mitones depende de quién los teja y los colores que use. Parece el patrón más sencillo del mundo, pero de eso nada...

Bien, disfrutad del trabajo de estas chicas, porque merece la pena!


 Claudia's owl hat

Elvira's poncho

Rosa's crochet hat

Flor's fingerless gloves

February 25, 2015

Give away!

A good launching needs a good giveaway, isn't it? So, from today February the 25th until next Wednesday March the 4th, you can participate in the giveaway I've organized in my facebook fanpage.

Todo buen lanzamiento debe ir acompañado de un sorteo. O no es así? A partir de hoy 25 de febrero y hasta el miércoles 4 de marzo podéis participar en el sorteo de uno de mis DIY Amigurumi Kits de "Minus", que he organizado en mi página de Facebook.


How to participate? 

2. Leave a comment in the picture
3. Share the picture

(If you don't follow the 3 steps your name won't be considered...)
(Please note that the giveaway doesen't include the finished dool, but just the DIY Kit!)

Cómo participar en el sorteo? 

1. Dale a "Me gusta" a mi página de facebook
2. Comenta la foto del sorteo
3. Comparte la foto del sorteo.

(si no cumples los 3 requisitos no se te tendrá en cuenta...)
(Ojo! : El sorteo es sólo del DIY Kit, no del muñeco terminado!)


Do you want to know about my DIY Amigurumi Kits? Here you have all the info:

Mijn Grote Familie (My big family) is my last project. It's about Minus, a 12 year old amigurumi kid, and his relatives and friends. In my shop you'll find their pdf patterns, DIY kits including everything you need to crochet them, the finished dolls and more surprises....

If you're still feeling like a child, if you vibrate every time you see toys and dolls and colours, this is your place!

Now that you're totally in love with Minus I know that you can't live without him... the same thing happened to me.

But don't worry, in this kit you'll find everything that you need to crochet your own amigurumi. Your very own Minus.

Level of experience: Intermediate.

What's in the kit?


-1 Crochet hook
-2 Amigurumi eyes
-2 Stitch markers
-1 Tapestry needle
-Cotton in 5 colours (red, orange, white, turquoise and navy blue), enough to crochet your doll.
-"Minus" label and gift label (you may want to make Minus as a present for someone...)
-Polyfill stuffing enough to stuff your crochet doll.
-Printed booklet with "Minus" pattern. 12 pages with a lot of pictures and images and step by step instructions.

All this materials come in a nice packaging, ready to give as a present.


Quieres saber más sobre mis DIY Amigurumi Kits? Aquí tienes toda la información:

Mijn Grote Familie (Mi gran familia) es mi último proyecto. Va sobre Minus, un amigurumi de 12 años, y sus parientes y amigos. En mi tienda encontrarás patrones en PDF para tejer a Minus y sus parientes, DIK Kits con los materiales necesarios para hacerlos tú mismo, y también el muñeco ya terminado para aquellos que no saben tejer, o simplemente no tienen ganas.

Este es Minus, tu nuevo amigo. Tiene 12 años y es muy simpático, siempre me cuenta historias muy divertidas sobre su loca familia. Lo que más le gusta a Minus es ver películas mientras merienda y su película favorita es Los Goonies. Y es que a Minus le encanta todo lo relacionado con piratas...

Si sigues sitiéndote como un niño, si vibras cada vez que ves juguetes y muñecos y colores, este es tu sitio!

Ahora que estás totalmente enamorad@ de Minus, se que ya no puedes vivir sin él... lo mismo me pasó a mi.

Pero no te preocupes, en este kit encontrarás todo lo que necesitas para tejer tu propio amigurumi. Tu Minus particular.

Nivel de experiencia: Intermedio

Qué incluye el kit?

-1 Aguja de ganchillo
-2 Ojos de amigurumi
-2 Marcadores de puntos
-1 Aguja lanera
-Algodón en 5 colores (rojo, naranja, blanco, turquesa y azul marino), sificiente para tejer tu muñeco de ganchillo.
-Etiqueta "Minus" y etiqueta de regalo (Quizás estás pensando en hacer un "Minus" para regalárselo a alguien)
-Relleno sintético suficiente para rellenar tu muñeco de ganchillo.
-Libreto impreso con el patrón de "Minus". 12 páginas a color con muchas imágenes, fotos e instrucciones paso a paso.

Todos estos materiales vienen cuidadosamente empaquetados, listos para ser regalados.


February 24, 2015

New Project, New shop!

MIJN GROTE FAMILIE
(My big family)

Mijn Grote Familie (My big family) is my new project. I've been posting hints about it on facebook and instagram lately, but finally I can tell you what is all this about. I'm so nervous that I don't even know where to start... Let's start with its main character, whom you already know a little bit, Minus.

Mijn Grote Familie (Mi gran familia) es mi nuevo proyecto. Os he estado avanzando bastante en facebook e instagram, pero hoy por fin os cuento de qué va la historia. Estoy tan nerviosa y emocionada que no se ni por donde empezar... Empecemos por su protagonista, al que ya habéis conocido hace unas semanas, Minus:


As I already told you, Minus is a 12 years old kid (well, amigurumi...) who loves The Goonies and eating his afternoon snack. Minus will introduce us his relatives and friends, he's always telling the most funny and bizarre stories about them.

But this is not the only news I have for you today, no, no, no! You can find Minus crochet dolls in my renewed Etsy shop. Yes, yes, yes, I'm back in business with all this online shop stuff after a break playing with physical stores. 

Como ya os comenté, Minus es un chavalillo de unos 12 años al que le encantan los Goonies y merendar. Minus nos va a ir presentando a su familia y amigos, de los cuales habla sin parar y cuenta las historias más rocambolescas.

Pero esta no es la única novedad. Podréis encontrar los muñecos de Minus en mi nueva tienda. Si, si, habéis leído bien, mi nueva tienda. Y es que retomo la aventura de las tiendas online que abandoné cuando me enfrasqué en la de las tiendas físicas. Vamos, que no me puedo estar quietecica.


It's a limited edition that I'll actualize as soon as I create new characters (I have to tell you that I have two new designs in the oven...) Besides the finished crochet doll, you'll find PDF patterns and DIY crochet kits with all the materials you need to make your own amigurumi and step by step instruccions.

Se trata de ediciones limitadas que iré actualizando a medida que vaya creando nuevos personajes. (Ya tengo a dos más en el horno...). Además del muñeco en si ya hecho, encontraréis también patrones en PDF para poder tejerlo vosotr@s mism@s, y también DIY kits de ganchillo con todos los materiales necesarios para tejer tu propio muñeco y el patrón impreso "a todo color!" con las instrucciones paso a paso.


What can I say, I'm as happy as a child in new shoes. This is a project that I wanted to bring into being a long time ago, and finally it's happening. Behind every little detail is plenty of effort, love and care.

Y qué os voy a decir, que estoy entusiasmada. Este era un proyecto que llevaba mucho tiempo queriendo realizar y por fin se han dado las circunstancias para llevarlo a cabo, tras muchos sudores y lágrimas... (y además de verdad... que, para colmo, ayer se me rompió la cámara de fotos y yo ,  que sin cámara no se vivir, me pegué una llantera que pa qué). Así que eso, que hay mucho esfuerzo, , mucho amor y mucho cariño detrás de cada detalle que da forma a este proyecto.


I've also updated my ravelry Store where you can find my free patterns from the blog and now Mijn Grote Familie  PDF's too.

También he actualizado mi tienda en Ravelry, donde encontrarás mis patrones, tanto los gratuitos del blog como los pdf de Mijn Grote Familie


So, here I am, waiting for you in my little shop. The door is open, feel free to come in!

Bueno, pues aquí os espero, en mi tienduca. La persiana ya está subida, venid cuando queráis!

February 20, 2015

Back Loop fingerless gloves

HOW TO CROCHET FINGERLESS GLOVES IN BACK LOOP


Before the cold is over I would like to show to you how to crochet this "very quick and easy crochet fingerless gloves". Two pieces, the cuffing and the glove, both in single crochet only in back loops, but with a very different effect since one is crocheted in rows and the other one in the round.

Antes de que se acabe el invierno quiero enseñaros a hacer estos mitones super fáciles y rápidos. Constan de dos partes, el puño y el guante. Ambas partes están tejidas con punto bajo por detrás de la lazada, pero como veréis los resultados son totalmente diferentes, ya que uno está tejido en filas de ida y vuelta y otro en vueltas en espiral.


You'll need: 4mm (G/6) crochet hook, yarn in colours brown A, green B, white C, ocher D, 6 buttons, scissors, stitch marker, tapestry needle

Materiales necesarios: Ganchillo de 4 mm, lanas de colores marrón A, verde B, blanco C, ocre D, 6 botones, tijeras, marcador, aguja lanera


Abbreviations:

BL In back loops
CH Chain
SC Single Crochet
SL ST Slip stitch
ST Stitch

Abreviaciones:

BL Por detrás de la lazada
Cad Cadeneta
PB Punto bajo
PR Punto raso
PT Punto
VTA Vuelta


The cuffing is a 18cm x 10,5cm (7"x 4") piece in ribbing stitch.

Foundation row: Chain 21
Row 1: 20 single crochet (sc)
Roows 2 to 32: Chain 1, 20 sc only in back loops (BL)
Fasten off.

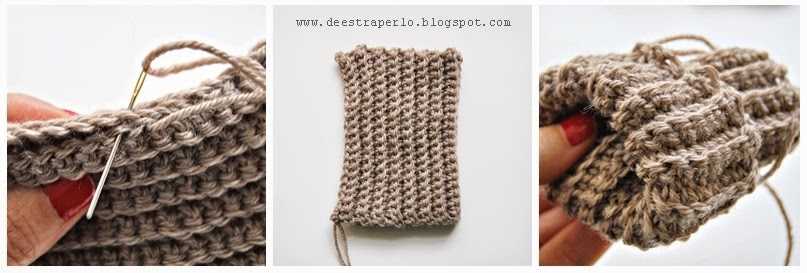
Once you've finished your piece, join the first and the last row with the tapestry needle forming a cylinder, and turn it over. 

El puño es una pieza de punto elástico de 18cm x 10,5cm aproximadamente, tejida en punto elástico.

Cadeneta base: 21 cadenetas
Fila 1: 20 puntos bajos (pb)
Filas 2 a 32: 1 cadeneta, 20 pb tejidos por detrás de la lazada. (BL)
Corta el color B.

Una vez terminada  nuestra pieza unimos la primera y la última fila con la aguja lanera formando un cilindro y le damos la vuelta.


The cuffing is done, let's start the glove:

Joining round: First of all we're going to crochet a slip stitch round in one of the cylinder edges, in order to get a neat division between both parts. Join color B and make slip stitches (sl st) all around the cuffing end, one sl st per cuffing row. As you have 32 cuffing rows you must have 32 sl st, but you'll have to add 2 more because the piece grows a little when sewing the two edges to form the cylinder. So you should have 34 sl st at the end of the round. Join the first sl st with the first sl st with a sl st a,d chain 1. Using a stitch marker will help you counting rounds.
Round 1: (from now on work in spiral) Sc in each sl st (34 sc)
Rounds 2 to 5: sc in each stitch (st), in BL (34 sc) 
Rounds 6 and 7: Join colour Csc in each st, in BL (34 sc) 
Round 8 (thumb hole): Chain 5, skip 7 sc, sc in the next sc and in every sc around, in BL.(5 chains and 27 sc)
Round 9: 7 sc over the 5 chains, sc in next sc and in every sc around, in BL. (34 sc)
Round 10sc in each st, in BL (34 sc) 
Rounds 11 to 15: Join colour Dsc in each st, in BL (34 sc) 

El puño ya está, vamos con el guante:

Vuelta de unión: Primero vamos a tejer una fila de punto raso (pr) alrededor de uno de los extremos del cilindro para obtener una división bien pulcra. Une el color B y teje pr alrededor del puño, un pr por cada fila del puño. Como tienes 32 filas en el puño, deberías tener 32 pr, pero tendrás que añadir 2 más ya que la pieza crece un poco al coser los dos extremos para formar el cilindro, por lo que al final tendrás 34 pr. Une el primer y el último pr con otro pr y haz una cadeneta. Usar un marcador te ayudará a contar las filas.
Vuelta 1: ( a partir de ahora trabajaremos en espiral) Pb en cada pr (34pb)
Vtas. 2 a 5: pb en cada punto en BL (34pb)
Vtas. 6 y 7: Une el color C, pb en cada punto, en BL (34pb)
Vta. 8 (agujero para el pulgar): Haz 5 cadenetas, salta 7 pb, pb en el siguiente punto y en cada punto alrededor, en BL (5 cadenetas y 27 pb)
Vta. 9: 7pb sobre las 5 cadenetas, pb en el siguiente punto y en cada uno alrededor, en BL. (34pb)
Vta. 10: pb en cada punto, en BL. (34pb)
Vtas. 11 a 15: Une el color D, pb en cada punto, en BL (34pb)


Make 2 and add the buttons in the opposite side of the thumb hole.

Haz dos piezas iguales y cose los botones, en el lado contrario del agujero para el pulgar.


Try different hooks and yarns, and different colour combinations. There're endless possibilites!!

Prueba distintos tamaños de aguja, distintos hilos y distintas combinaciones de color, las combinaciones son infinitas y podrás lucir guantes nuevos con cada modelito.


More pictures in instagram!

February 13, 2015

Ribbing stitch in back loops

Now you know how to crochet only in back loops, and today we are going to learn one of the stitches that uses this technic, the ribbing stitch. This stitch provides texture and elasticity to your work and as you see is very similar to the knitted ribbing stitch. That's why we use it in the same way, for cuffing, necklines, wristband...

El otro día vimos cómo trabajar por detrás de la lazada, y os comenté que esa técnica podía tener varios usos. Uno de ellos es el punto elástico. Un punto que proporciona textura y elasticidad a vuestro trabajo. La elasticidad varía según el tamaño de la aguja y de la lana y, por supuesto también influye vuestra tensión. Si os fijáis, veréis que su aspecto recuerda mucho al punto elástico de las  dos agujas, es por ello que también se suele usar para acabados como puños y cuellos en la ropa hecha con crochet.


You'll see how easy this is! Let's start with a chain and a single crochet (sc) stitch row.

Bien, pues vamos al lío. Esto es lo más fácil del mundo. Empezamos con una cadeneta y una fila de punto bajo.


Now keep crocheting sc rows but only in back loops. (If you don't know how to do it check my tutorial here)

A continuación seguimos tejiendo filas de punto bajo, pero sólo por detrás de la lazada. (Si no sabes cómo hacerlo, consulta el tutorial de cómo tejer por detrás de la lazada). 


And that's all! Keep crocheting until you've reached the desired length! We'll see soon more tutorials about the ribbing stitch. You're going to love it!

Y ya está! Sigue hasta que alcances el tamaño deseado! Pronto veremos más tutoriales sobre el punto elástico y sus usos. Os va a encantar!

Related Posts Plugin for WordPress, Blogger...